Archives

All posts for the month November, 2011

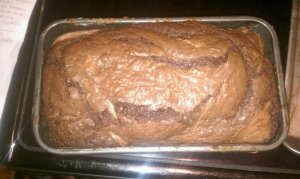
Nutella Banana Bread

Published November 27, 2011 by ciannucci

What did I say? I promised I would add more nutella recipes…well here is another one. Bananas…one of my favorites. Nutella…another one of my favorites. Combine the two…watch out!!

Gooey Nutella Banana Bread

Ingredients

  • 2 cups all-purpose flour
  • 3/4 tsp. baking soda
  • 1/2 tsp. salt
  • 1/4 cup unsalted butter, at room temperature
  • 1 cup granulated sugar
  • 2 large eggs
  • 1 1/4 cups mashed ripe banana
  • 1/3 cup skim milk
  • 1 tsp. vanilla extract
  • 3/4 heaping cup Nutella 

Directions

1. Preheat oven to 350 degrees. Spray 8×4-inch loaf pan with nonstick spray.

2. In a medium bowl, whisk together flour, baking soda & salt.

3. In a separate large bowl, beat sugar and butter with an electric mixer at medium speed until blended. Add eggs, one at a time, beating well after each addition. Add banana, milk and vanilla. Beat until blended.

4. Add flour mixture, beat at low speed just until flour is incorporated (don’t over mix).

5. Spoon Nutella into a small dish and soften in the microwave for about 15 seconds. Add 1 cup of the banana bread batter to the Nutella and stir until blended well. Spoon Nutella batter alternately with plain banana bread batter into the prepared pan. Swirl batters together with a knife.

5. Bake 50 to 60 minutes, it will seem a tiny bit undercooked but that’s what makes it good. Cool for at least 15 minutes in the pan, and then turn out onto a wire rack to cool completely.


Nutter Butter Nutella Cream Pie

Published November 27, 2011 by ciannucci

Who can honestly say they are not a fan of the wondrous goodness of the creamy hazlenut spread we know as Nutella? Nutella was actually introduced to me around the age of 10 by my italian neighbor. I used to go to her house to play and she always fed me a nutella sandwich. One sandwich and her house quickly became my second home. I have never heard of anyone say they do not like nutella. It is simply pure heaven. This year I am trying to see how many recipes I can actually create with nutella in it. Did I also mention I am a peanut butter lover? Mix these two ingredients and your life will be complete. Here is my first nutella recipe.

Nutter Butter Nutella Cream Pie

for the crust-
24 nutter butter cookies
1/4 cup butter

for the filling-
2-8 oz. packages cream cheese, softened
3/4 cup granulated sugar
1 teaspoon vanilla
1/2 cup nutella
1/2 cup whipping cream

for nutella ganache {optional}
1/4 cup nutella
1/4 cup cream {or more if you like a thinner ganache}

Directions:

Spray 9-inch pie plate with non-stick cooking spray and set aside.

{1}Place nutter butter cookies into food processor and grind until they are fine crumbs. Stir together with melted butter.

{2}Press into prepared pie plate. Place into refrigerator to chill.

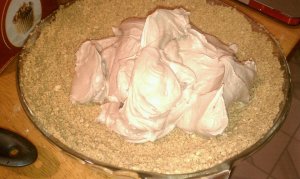
{3}For the filling, whip cream cheese and sugar together until well blended. Stir in vanilla and nutella. Scrape sides of bowl and mix again briefly. Stir in cream and then increase speed and whip 3 minutes or until very thick.

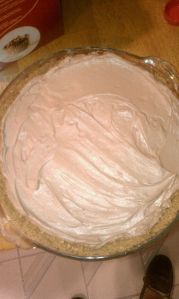
{4}Pour into pie crust and smooth the top. Refrigerate until set, at least 2 hours.

To serve, prepare nutella ganache by microwaving nutella and cream together until a thin sauce forms. Drizzle over pieces of pie.

 Bet you can taste this through the picture…


Brown Bag Apple Pie

Published November 27, 2011 by ciannucci

…I know what you are thinking… Brown Bag?? What does that mean? Well, actually, it means exactly that. I baked an apple pie INSIDE of a brown bag. And let me tell you…it was the most BEAUTIFUL apple pie ever created. I promise you. The crust turns out to be the most gorgeous flaky crust you’ve ever witnessed and the filling is perfectly cooked. I like apple pie, but I am a bigger fan of apple crumble. Instead of a hard shell, I like the little buttery, soft crumbles that layer on top of the apples. Here is a recipe that will blow your mind. Oh… and don’t burn your house down. I am serious.

Brown Bag Apple Pie

Let’s start with the crust.

Place the following in a mixing bowl:

1 1/4 cups of King Arthur Unbleached all purpose flour
heaping 1/4 teaspoon salt
3 tablespoons vegetable shortening

Mix to combine.

Add 1/4 cup (4 tablespoons) cold unsalted butter, cut into 1/2″ pieces.

Work the butter into the flour until the mixture is unevenly crumbly. You can use a pastry blender or mixer to do this, but really, your fingers are the best tools for the task.

Add 4 to 5 tablespoons ice water 1 tablespoon at a time, mixing with a fork as you sprinkle the water into the dough

When the dough is moist enough to hold together when you squeeze it, transfer it to a piece of parchment or a lightly floured surface.

Gently pat it into a smooth disk. Wrap in plastic, and refrigerate for about 30 minutes.

While the dough is in the fridge, make the filling.

You’ll need 8 cups sliced apples, which translates to about 3 1/2 to 4 pounds purchased weight.

Peel and core the apples.All you have to do is cut the slices into smaller pieces.

Put the apples in a big microwave-safe bowl, and add the following:

¾ cup brown sugar
1 teaspoon ground cinnamon
¼ teaspoon salt
½ teaspoon ground nutmeg
2 tablespoons lemon juice
2 tablespoons boiled cider, optional but tasty

Stir until the spices are fully distributed. Microwave the filling, uncovered, for 5 minutes. This softens the apples just a bit, and gets their juices flowing. Skip this step if you like; it’s not critical, though I think it helps.

Start preheating your oven to 425°F.

Next, spray a 9′ pie pan, one that’s about 1 1/2″ deep, with non-stick spray.

Why the spray? It makes it easier to get slices out intact, and helps counteract the stickiness of any potential filling leak.

Take the dough out of the fridge. If it’s been chilling longer than 30 minutes, give it 10 minutes or so to warm up a bit.

Place the dough on a well-floured surface; a rolling mat works well here, and makes cleanup a breeze.

Roll the dough into a circle, making sure to keep the underside well-floured to prevent sticking. A giant spatula is a big (well, a giant!) help here.

Roll the crust until it’s between 12″ and 13″ diameter.

Transfer the crust to the pan. Again, that giant spatula comes in handy.

Settle it gently into the pan, without stretching.

Did you know that stretching your pie crust is one of the reasons a crust sometimes shrinks as it bakes? It pays to be gentle.

Streusel

Mix the following until crumbly:

1/2 cup granulated sugar
1/2 cup (2 1/8 ounces) King Arthur Unbleached All-purpose Flour
1/2 cup (8 tablespoons) cold butter, cut into pats

Spoon the apple filling into the crust.

Spread the streusel on top.

Ah, here comes the paper bag part. Put the pie in a large brown grocery bag. Paper, not plastic!!!

Fold the opening closed, and secure it with staples or paper clips.

Note: If you have ANY hesitation at all about doing this – contaminants in recycled paper, lead-based inks, you’re afraid of the bag catching on fire, whatever – substitute parchment paper. Staple two pieces together to fashion a bag; you’ll want to make sure your pie pan doesn’t have an overly wide rim, so it fits in the “bag.”

I baked the pie a paper grocery bag, and it turned out fine. This doesn’t guarantee results for everyone. As I said – any hesitation, use parchment, OK?

Put the pie in its bag (paper, or parchment) on a baking sheet.

Bake the pie in a preheated 425°F oven for 50 min.

Remove the baking sheet and pie from the oven, and carefully slit the bag open, watching out for steam.

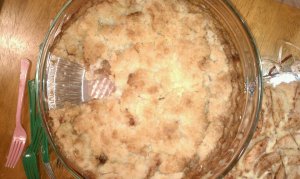
…Golden crust, light-gold streusel…

Let the pie cool for an hour or so before cutting. Serve it warm, or at room temperature.

Vanilla ice cream is always welcome.

Wala!

Bananas for Bananas

Published November 27, 2011 by ciannucci

I don’t know about you but I am CRAZY about bananas! Therefore; it was no question that I was going to make something banana-ish for one my my thanksgiving desserts. I decided on a banana pudding with chessman cookies. I skipped the nilla wafers and decided on the chessman cookies instead because the nilla wafers aren’t as rich and buttery. The more butter…the better. Out of all the desserts I made for thanksgiving, I think this one takes the cake…if that even makes sense. If you are a butter cookie/banana fan you must go to the store, get these ingredients, and make this right NOW.

Banana Cookie Pudding

Ingredients

1   12-ounce container frozen whipped topping thawed, or equal amount sweetened whip
1   14-ounce can sweetened condensed milk
1   8-ounce package cream cheese, softened
2 cup milk
1   5-ounce box instant French vanilla pudding
6-8   bananas, sliced
2   bags Pepperidge Farm Chessmen cookies

Directions


Line the bottom of a 13x9x2-inch dish with 1 bag of cookies and layer bananas on top.

In a bowl, combine the milk and pudding mix and blend well using a handheld electric mixer.  Using another bowl, combine the cream cheese and condensed milk together and mix until smooth.  Fold the whipped topping into the cream cheese mixture.  Add the cream cheese mixture to the pudding mixture and stir until well blended.  Pour the mixture over the cookies and bananas and cover with the remaining cookies.  Refrigerate until ready to serve.


Enjoy!

Caitlin’s Carrot Cake!!

Published November 15, 2011 by ciannucci
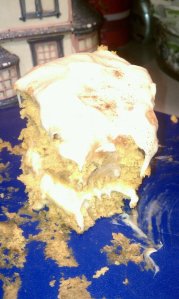
Yes!!! I am SUPER excited about this recipe because Carrot Cake is one of my all time favorite desserts. Every birthday, I INSIST on a carrot cake. I can’t get enough of the cream cheese frosting…I LOVE IT! This cake is currently selling at The Twisted Vine Restaurant as a special. Oh yeah…did I mention that I am making desserts for the restaurant every week. So PLEASE stop by and try one of my creations. Who doesn’t like a good dessert? The first special was the pumpkin crunch cake…for halloween I sold a graveyard cake..and finally this past week they are selling carrot cake. There is only a few slices yet so you better go get em!
Caitlin’s Carrot Cake

Ingredients

  • Cake:
  • 5 eggs room temp
  • 3 C. sugar
  • 1 C. oil
  • 1 C. buttermilk, or 1 C. plain low-fat yogurt
  • 1 Tbs. vanilla
  • 3 C. flour
  • 1 Tbs. baking soda
  • 1 Tbs. cinnamon
  • 1/2 tsp. salt
  • 3 C. shredded carrots
  • one 20-oz crushed pineapple, drained
  • 1 1/2 C. sweetened coconut
  • 1 cup nuts, optional
  • Cream Cheese Icing:
  • 8 oz. cream cheese, room temperature
  • 1/2 C. butter, room temperature
  • 4 C. sifted powdered sugar
  • 1 tsp. vanilla
  • 1/2 C. chopped nuts, optional

Directions


To Make Cake
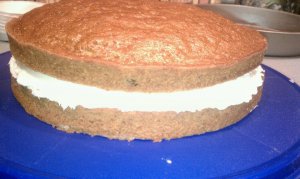
Preheat oven to 325º. Mix together eggs, sugar, oil, buttermilk and vanilla until well mixed. In a separate bowl, mix together flour, baking soda, cinnamon, and salt. Stir the dry ingredients into wet mixture, half at a time. Add carrots pineapple, coconut, and nuts. (I usually omit the nuts, since I don’t care for nuts in things) Mix well. Pour 8 cups of mixture into 9×13 pan or 10″ round pan. Bake in preheated oven for 55-60 mins, or until done. Cool on wire rack.

To Make Cream Cheese Icing
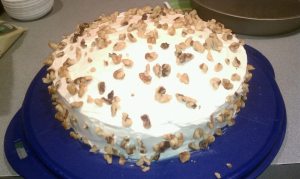
Beat cream cheese and butter untill fluffy. Gradually add powdered sugar, beating until smooth; stir in vanilla. Spread over cooled cake; sprinkle with nuts, if desired


Walnuts to garnish….you may choose to do without.


Vegan Peanut Butter Banana Cookies

Published November 15, 2011 by ciannucci

Hi lovers! Hope everyone is having a stress-free week…if not, eat a cupcake. Or a cookie. In fact, make THESE cookies and have one of those. Your stress will float away.

I went out on Friday night with a bunch of my favorite girlfriends in Hartford. One of my friends Kim told me about a vegan cookie recipe she always makes. At first I was hesitant…I don’t usually do vegan. But I figured it was worth a shot! Hey what’s better then a delicious cookie???? A HEALTHY delicious cookie!

Banana & Peanut Butter Flaxseed Cookies

Ingredients:
2 cups whole-wheat pastry flour
2 tbsp ground flaxseed
1 tsp baking soda
1/2 tsp sea salt
1 medium banana, mashed
3/4 cup pure maple syrup
1 cup unsalted natural peanut butter
2 tsp pure vanilla
1/4 cup mini dark chocolate chips, optional

Preheat oven to 350°F. Line a large baking sheet with parchment paper. In a medium bowl, combine flour, flaxseed, baking soda and salt. Set aside. In a large bowl, mash banana with a fork. Stir in maple syrup, peanut butter and vanilla until well combined. Add flour mixture to banana mixture, stirring just to combine; do not over-mix. Fold in chocolate chips, if desired. Drop dough by rounded tablespoons onto baking sheet. Bake for 10 to 12 minutes, until lightly browned. Transfer sheet to a wire rack to cool slightly, about 2 minutes.
Remove cookies from sheet and let cool directly on rack.


Now you don’t actually have to use flaxseed. I only had flaxseed oil and not flaxseed meal so I left it out altogether and they came out GREAT. Now here is the test….TRY to eat just 1. That’s the problem…they aren’t so bad for you. Not filled with unnecessary sugar and fatty oils. However; there’s no way you are getting away with 1. The first time I made these…I ate 4. My dad…5. My mom….6. Yes, they are that scrumptious.

Shortbread Surprise!

Published November 4, 2011 by ciannucci

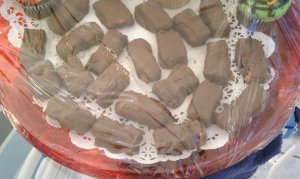
Hi friends! Today was a busy, chaotic, and tiring day. However; I did manage to get some baking in. Success! What was on the menu? Well, I had to get rid of the extra candy corn lying around the house so I made another batch of the butterfingers. This time I used dark chocolate instead. The chocolate started to harden as I was dipping the bars so they didn’t come out as pretty as last time. Just as scrumptious though!

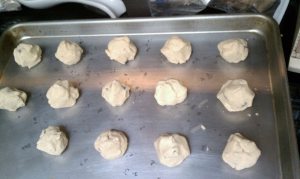
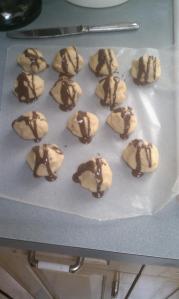
Today’s new adventure was my Shortbread Surprise cookies! I like shortbread. It is not my absolute favorite…as you know, I am more of a CHOCOLATE person. BUUTT, my mom, dad, and brother all LOVE shortbread. Therefore; shortbread it is. And, since I couldn’t just settle for shortbread alone…what did I dad? You got it. Chocolate.

SHORTBREAD SURPRISE COOKIES 

Ingredients:

1 cup of shortening

1/3 cup of sugar

1/3 cup of light brown sugar (packed)

1 teaspoon of vanilla

2 cups of flour

1 cup of mini chocolate chips, M&Ms, or whatever you choose ( I did mini peanut butter morsels)

1. Preheat oven to 375 degrees.

2. In a large bowl, beat shortening, sugars, and vanilla until well blended.

3. Add flour and beat until smooth.

4. Stir in Mini hershey kisses, M&M’s, or peanut butter morsels

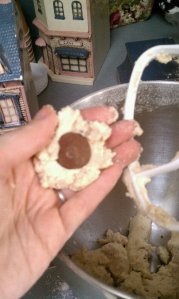
5. Mold the batter around the unwrapped hershey kiss to form a ball.


6. Place onto ungreased cookie sheet.

7. Bake 10-12 Minutes

8. Cool slightly and remove from cookie sheet to wire rack.

9. Prepare chocolate drizzle if desired and drizzle over each cooled cookie. (I cheated and used magic shell)

10. Eat and enjoy 🙂


Finger Lickin’ Butterfingers

Published November 3, 2011 by ciannucci

On Halloween, someone asked me a question that brought me back to childhood. The question was “when you went trick-or-treating, which was the one candy you always grabbed first out of the candy bowl?” I thought about it…but didn’t have to think long seeing as I’m a chocolate lover…these questions don’t necessarily stump me.  I have about 5 go-to candy bars and a few I would NEVER choose. Here are my top 5: ( And obviously they are all chocolate)

1. Snickers

2. Hersheys with Almonds

3. Twix

4. Reeces Peanut Butter Cups

5. Almond Joy

Here are the 5 I would prefer to pass on:

1. Butterfinger

2. Three Muskateers

3. Nestle Crunch Bar

4. Starburst

5. Skittles

I don’t know what it is about a butterfinger but it never appealed to me. Perhaps it is the crunchiness or the fact that it gets stuck in your teeth too easily. So when someone offered me a homemade butterfinger recipe I was apprehensive since I’m not a fan of the candy.

I tried it anyways, hoping it may be better then the real thing. Good news! These are WAY better then the real thing. I have friends and family to testify.

The best part: They have only THREE ingredients. And you may even be a little surprised as to what they consist of but I promise you, you can’t go wrong.

Ready for this?…..you sure?

HOMEMADE BUTTERFINGERS

Ingredients:

16 oz bag of Candy Corn ( YES! Candy corn!)

16 oz jar of peanut butter

Chocolate

1. Melt the bag of candy corn in a saucepan until it becomes a liquid.

2. Add the jar of peanut butter and the candy corn into a mixer and mix for about three minutes.

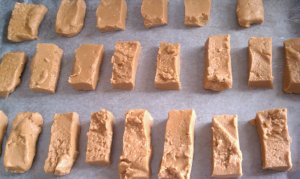
3. Spread out the mixture onto a piece of wax paper so that it is thick enough to cut into pieces.

4. Freeze for about 20 min.

5. Take out of freezer and cut into squares, rectangles (whichever shape you prefer)

6. Melt chocolate.

7. Dip each bar into the chocolate and set onto another tray covered with wax paper.

8. Refrigerate until chocolate is hardened.

I am one of those people who does NOT like my candy cold. Some people love to freeze their candy…I actually prefer to warm mine up. It is your choice as to how you store these. You may not be storing them for too long though. They could be gone in minutes!

The best part of this recipe is that the consistency is perfect. I would compare it to the consistency of a three muskateers bar. Almost marshmallowy with a peanut butter flavor.

Next year, I know what you will be handing out for halloween 😉

Some more S’mores please

Published November 3, 2011 by ciannucci

Who doesn’t love that ooey, gooey campfire treat? S’mores are the perfect blend of chocolate, melty marshmallows, and crunchy sweet graham crackers.

But why stop with traditional? Yes, we have the camp fire to thank for this delicious treat but these flavors blend so well with too many other desserts to stop there!

Here are the recent s’mores creations I have made in the past month. And I can promise there will be more to come.

S’MORES CRISPY TREATS


Ingredients:

1 box of golden grahams

1 stick of butter

1 bag of marshmallows (big or small)

Chocolate chips

1. Melt the stick of butter in a saucepan.

2. Add in marshmallows and mix until they turn completely into liquid.

3. Add in bag of golden grahams and stir continuously until marshmallow is evenly separated.

4. Mix in as many chocolate chips as your little heart desires.

5. Grease pan and flatten out the cereal into the pan.

6. Let cool and cut. For these, I do not like to cut into perfect squares. They are more fun when they are random shapes and sizes.

Next,

S’MORES BROWNIES

This is a recipe I created when I had all the ingredients for s’mores but didn’t want to settle for the traditional thing.

Ingredients:

1 box of brownie mix

1 bag of marshmallows

1 box of graham crackers

1 hershey bar

1. Grease and flour the bottom of a baking pan.

2. Layer the bottom with graham crackers. You may need to break a few to fit them evenly into the pan.

3. Make brownie mix and add in a cup of marshmallows.

4. Pour mix over graham crackers.

5. Bake for 20 minutes. I like to under cook these a little because they will be going back into the oven for a few more minutes later.

6. Pour entire bag of marshmallows over the of the brownies.

7. Turn oven to broil and put the brownies back into the oven for about three minutes.

8. Marshmallows will brown quickly so keep an eye on them.

9. As soon as you take them out, place pieces of graham cracker and hershey bar on top of marshmallow so that they melt into it.

10. Cool and cut into squares.

These are extremely messy…but all the better!


YUM, YUM, YUM!

Desserts for special occasions!

Published November 3, 2011 by ciannucci

Lately, I have made many desserts for occasions that have recently passed. Here are some recipes you may love as much as I do!

For breast cancer awareness month I made PINK rice krispy treats with decorative pink ribbons. EXTREMELY EASY and oh so yummy!

PINK RICE KRISPY TREATS

Ingredients:

1 stick butter

6 cups of rice krispies

1 bag of marshmallows (big or small)

food coloring

pink candy corn (optional)

frosting (optional)


To start, melt the stick of butter in a saucepan at medium heat.

Add in the entire bag of marshmallows.

Stir continuously for about four minutes until marshmallows turn completely to liquid.

Drop in three to four drops of red food coloring. I suggest four because mine didn’t turn out as pink as I wanted them to.

Stir in the 6 cups of rice krispies.

Mix until marshmallow is evenly separated throughout the cereal.

Mix in candy corn.

(you can add any type of candy you like…chocolate chips are great as well!)

Grease a baking pan and spread the treats evenly  until they have formed the shape of the pan.

Press down the treats with a fork.

Let cool for about an hour.

Cut into squares and decorate however you’d like. In this case, add pink ribbons!

Next…we move on to halloweeen!

There are many unique ideas and creations for halloween treats. This is a recipe for a cake I made for the Twisted Vine Restaurant to sell for Halloween weekend.

GRAVEYARD CAKE

Ingredients:

1 Box Devil’s food cake mix

1 package of oreo pudding

1 pack of oreos

1 jar of hot fudge

1 can of chocolate frosting

This cake is cheap and easy as well. If you are a chocolate lover, you will LOVE this.

Bake the cake at 350 Degrees for 30-35 min.

While the cake is baking mix together your oreo pudding

You can make the cake from scratch as well…I actually suggest that…

Once cake is cooled…cut the cake directly across the center horizontally.

Flip the top of the cake over so that you now have two even layers.

Make sure the center is completely cooled. When it is, spread the oreo pudding evenly over the bottom layer.

Replace the top layer onto the cake.

For the frosting, mix together 1 can of chocolate frosting, 1 row of oreo cookies, and a half a jar of hot fudge.

Spread over the top of the cake and add extra oreos if you choose! Add milano cookies to represent the graves if you like as well…

So where are we? Thanksgiving?

This next recipe is a MUST-MAKE. It absolutely NEEDS to make an appearance on your thanksgiving dessert table.

It is CRAZY expensive and VERY intensive…however; I promise you it is worth every dollar and minute it takes for this cake come together.

PUMPKIN CRUNCH CAKE

There are 3 steps to it. You have to start with the crunch topping because it is layered on the bottom of each cake pan. Then move on to the cake and while that is baking, make your frosting. It calls for marscapone…I used it…not so use how much of a difference it made..it says you can just substitute it for more cream cheese. It’s an expensive cake so next time I might skip the marscapone.

Crunch Topping
3 Cups Walnuts, finely chopped
3 Cups Vanilla Wafers (about 75 cookies)
3 Cups Brown Sugar
3 Sticks Butter

1. Melt Butter
2. In a food processor, pulse cookies to a fine crumb
3. Then Pulse walnuts to a fine chop
4. Add in Brown Sugar and mix well.
5. Add in Melted Butter and blend together.
6. Divide mixture into 4 Cake Coated Cake Pans, pressing into bottom and spreading it evenly into the cake pans. Reserve about 2 cups of the mixture which will be baked to use on the sides of the cake.
7. Set pans aside and begin cake.
8. Pre heat Oven to 350 degrees.

Pumpkin Crunch Cake
1 1/4 Cup Sugar
1 1/2 sticks of Softened Butter
1 16 oz can Solid Pack Pumpkin (not pumpkin pie mix)
2 1/2 Cups Flour
1/2 Cup Greek Yogurt
1 Tablespoon Pure Vanilla
1 Tablespoon Pumpkin Pie Spice
2 1/4 Teaspoons Baking Powder
3/4 Teaspoon Baking Soda
1/2 Teaspoon Salt
3 Large Eggs

1. In your mixer beat sugar and butter for about 5 minutes until light and fluffy, scrapping down the bowl frequently .
2. Add In Pumpkin and all the rest of the ingredients, except the eggs. Mix just until blended.
3. Add in the Eggs, one at a time just until blended.
4. Divide batter equally into your 4 prepared cake pans, smooth it out and make it as even as possible in the pan.
5. Place remaining crunch mixture in another cake pan or pie dish and allow to bake for the smae amount of time as the cakes.
6. Bake in a 350 degree oven for about 20-25 minutes or until a toothpick inserted in the center comes out clean. If you use 2 racks to bake on in the oven, at the halfway mark rotate the pans .
7. Allow pans to cool about 10 minutes, then turn them out onto a wire racks and allow to completely cool.
8. break up the extra crunch mix to very small bits to use to decorate the cake with.

while your cakes are baking prepare a Cream Cheese Frosting.

Cream Cheese Frosting
3 8 oz packs Cream cheese
16 oz Marscapone
2 sticks Softened Butter
1 lb 10 x Sugar
1 Tablespoon Pure Vanilla

Whip the cream cheese, marscapone, and butter till very smooth and creamy
Slowly add in the 10x sugar while mixer is on low setting
Add in Vanilla and mix well. Set aside till needed.

After your cake is completely cooled ( you can even refrigerate for a few hours) begin frosting the layers and putting the cake together. After you have assembled all the layers with some frosting between them, start to spread the remaining frosting on the sides and top. When finished frosting, coat sides and top with your extra crunch mixture ( you can eliminate this step).

Now your incredibly good Pumpkin Crunch Cake is finished. It should be allowed to chill for a few hours before cutting, it will help firm up this cake.

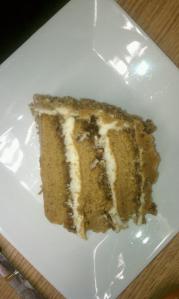
The crunch topping is my favorites part. I could eat that for dessert alone!

If you are looking for a much easier and inexpensive pumpkin dessert you can’t go wrong with this next one.

This dessert is actually LOW SUGAR AND LOW FAT. I know…you are thinking…how is that possible?

Well…it is. AND it’s only TWO ingredients.

EASY BUT DELICIOUS PUMPKIN CAKE

1 box  of sugar free yellow cake

1 can of pumpkin

Mix together and bake as a cake, muffins, cupcakes….whatever you like!

Knowing me…I couldn’t stop at just those two ingredients.

SO…if you choose…add chocolate chips, nutmeg, pumpkin spice, and cinnamon.

I also made my cake double layered and used a cream cheese frosting to fatten it up a bit.

The consistency of this cake is not my favorite. But for low fat and sugar free…it totally does the trick.

NOW GO TRY IT!